Hi everybody! In this article we continue with the conversion of our fire van. We don't sit still, because a lot has happened in the meantime! We placed walls, laid a vinyl floor and built in a window. We have been very busy lately and therefore let our videos and stories take a little longer than you are used to from us.
Also read: How to: Buy or convert a campervan
We have now also been to the RDW and we have booked a campsite for our first weekend away! The last time we told about it raising the roof and the insulating fire brigade bus brumm. The next step in the conversion process is installation! Starting with laying the vinyl on the new floor and installing the walls and windows. We tell you all about it in this article!
Installing walls
We started installing the walls after Brumm had completely insulated the fire brigade bus. As we have said before, it is important that Brumm is as light as possible in connection with the inspection at the RDW and the rate of road tax.
Also read:
Converting a fire van into a camper (1) | The Backpack Pick
Converting a fire van into a camper (2) | Buy a suitable bus
Converting a fire van into a camper (3) | RDW design requirements and job plan
Converting a fire van into a camper (4) | A new floor
Converting a fire van into a camper (5) | Insulating the bus
Converting a fire van into a motorhome (6) | Raising the roof
Converting a fire van into a camper (7) | Installing walls, vinyl and windows
Converting a fire van into a camper (8) | Arranging and installing furniture
Flexible material – 6mm poplar plywood wood
That's why we used 6mm poplar plywood for the walls. This material is not only light, but also thin and flexible. That is important, because Brumm is not completely straight. The walls are slightly curved, so when the fire bus is built in, it is nice if the walls can bend a bit. It is in any case very important to take that curve into account, because if furniture is placed against the walls, one side of the furniture must also have that curve.
Painting and decorating
After cutting the plates, they get a coat of paint. This is not only where the installation starts, but also the furnishing. Because what color do we want on the walls? We will write a separate article about the interior of Brumm and the choices we made, but we can already tell that the walls have turned cream white.
Pay attention to electricity and power points
When you start installing the walls, it is important to consider where the power points and the lamps should be located. The power wires must be laid before the walls are screwed into the frame. After this you can no longer access it. Also take into account the correct wiring. 3x 1.5mm for 220v transit. 2,5mm for 12v throughput.
Laying vinyl in the fire truck
After the walls have been screwed down, we started laying the floor. This is also a furnishing choice. We soon decided which vinyl (sail) we wanted. This is easy to clean, gives a nice warm look, is relatively light, does not rumble, the work is insulating and is also very easy to screw through when you are going to fix the furniture on top. A whole laundry list of benefits!
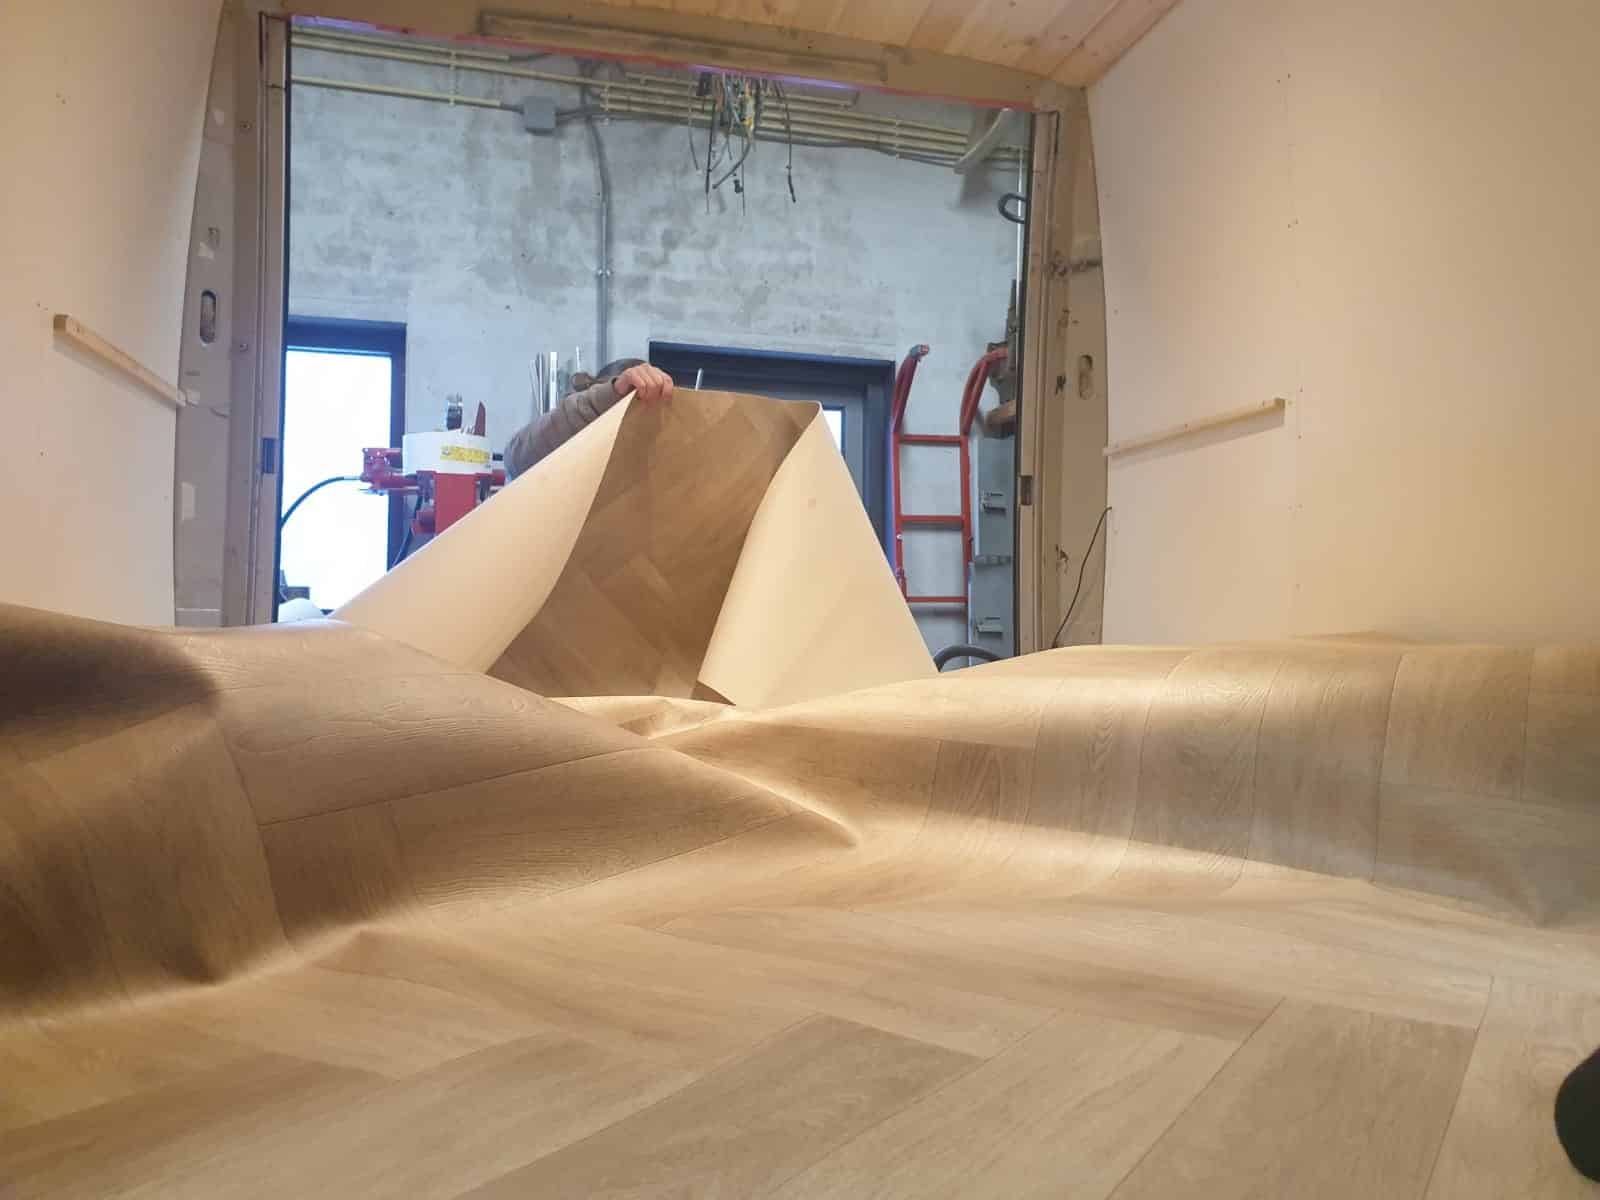
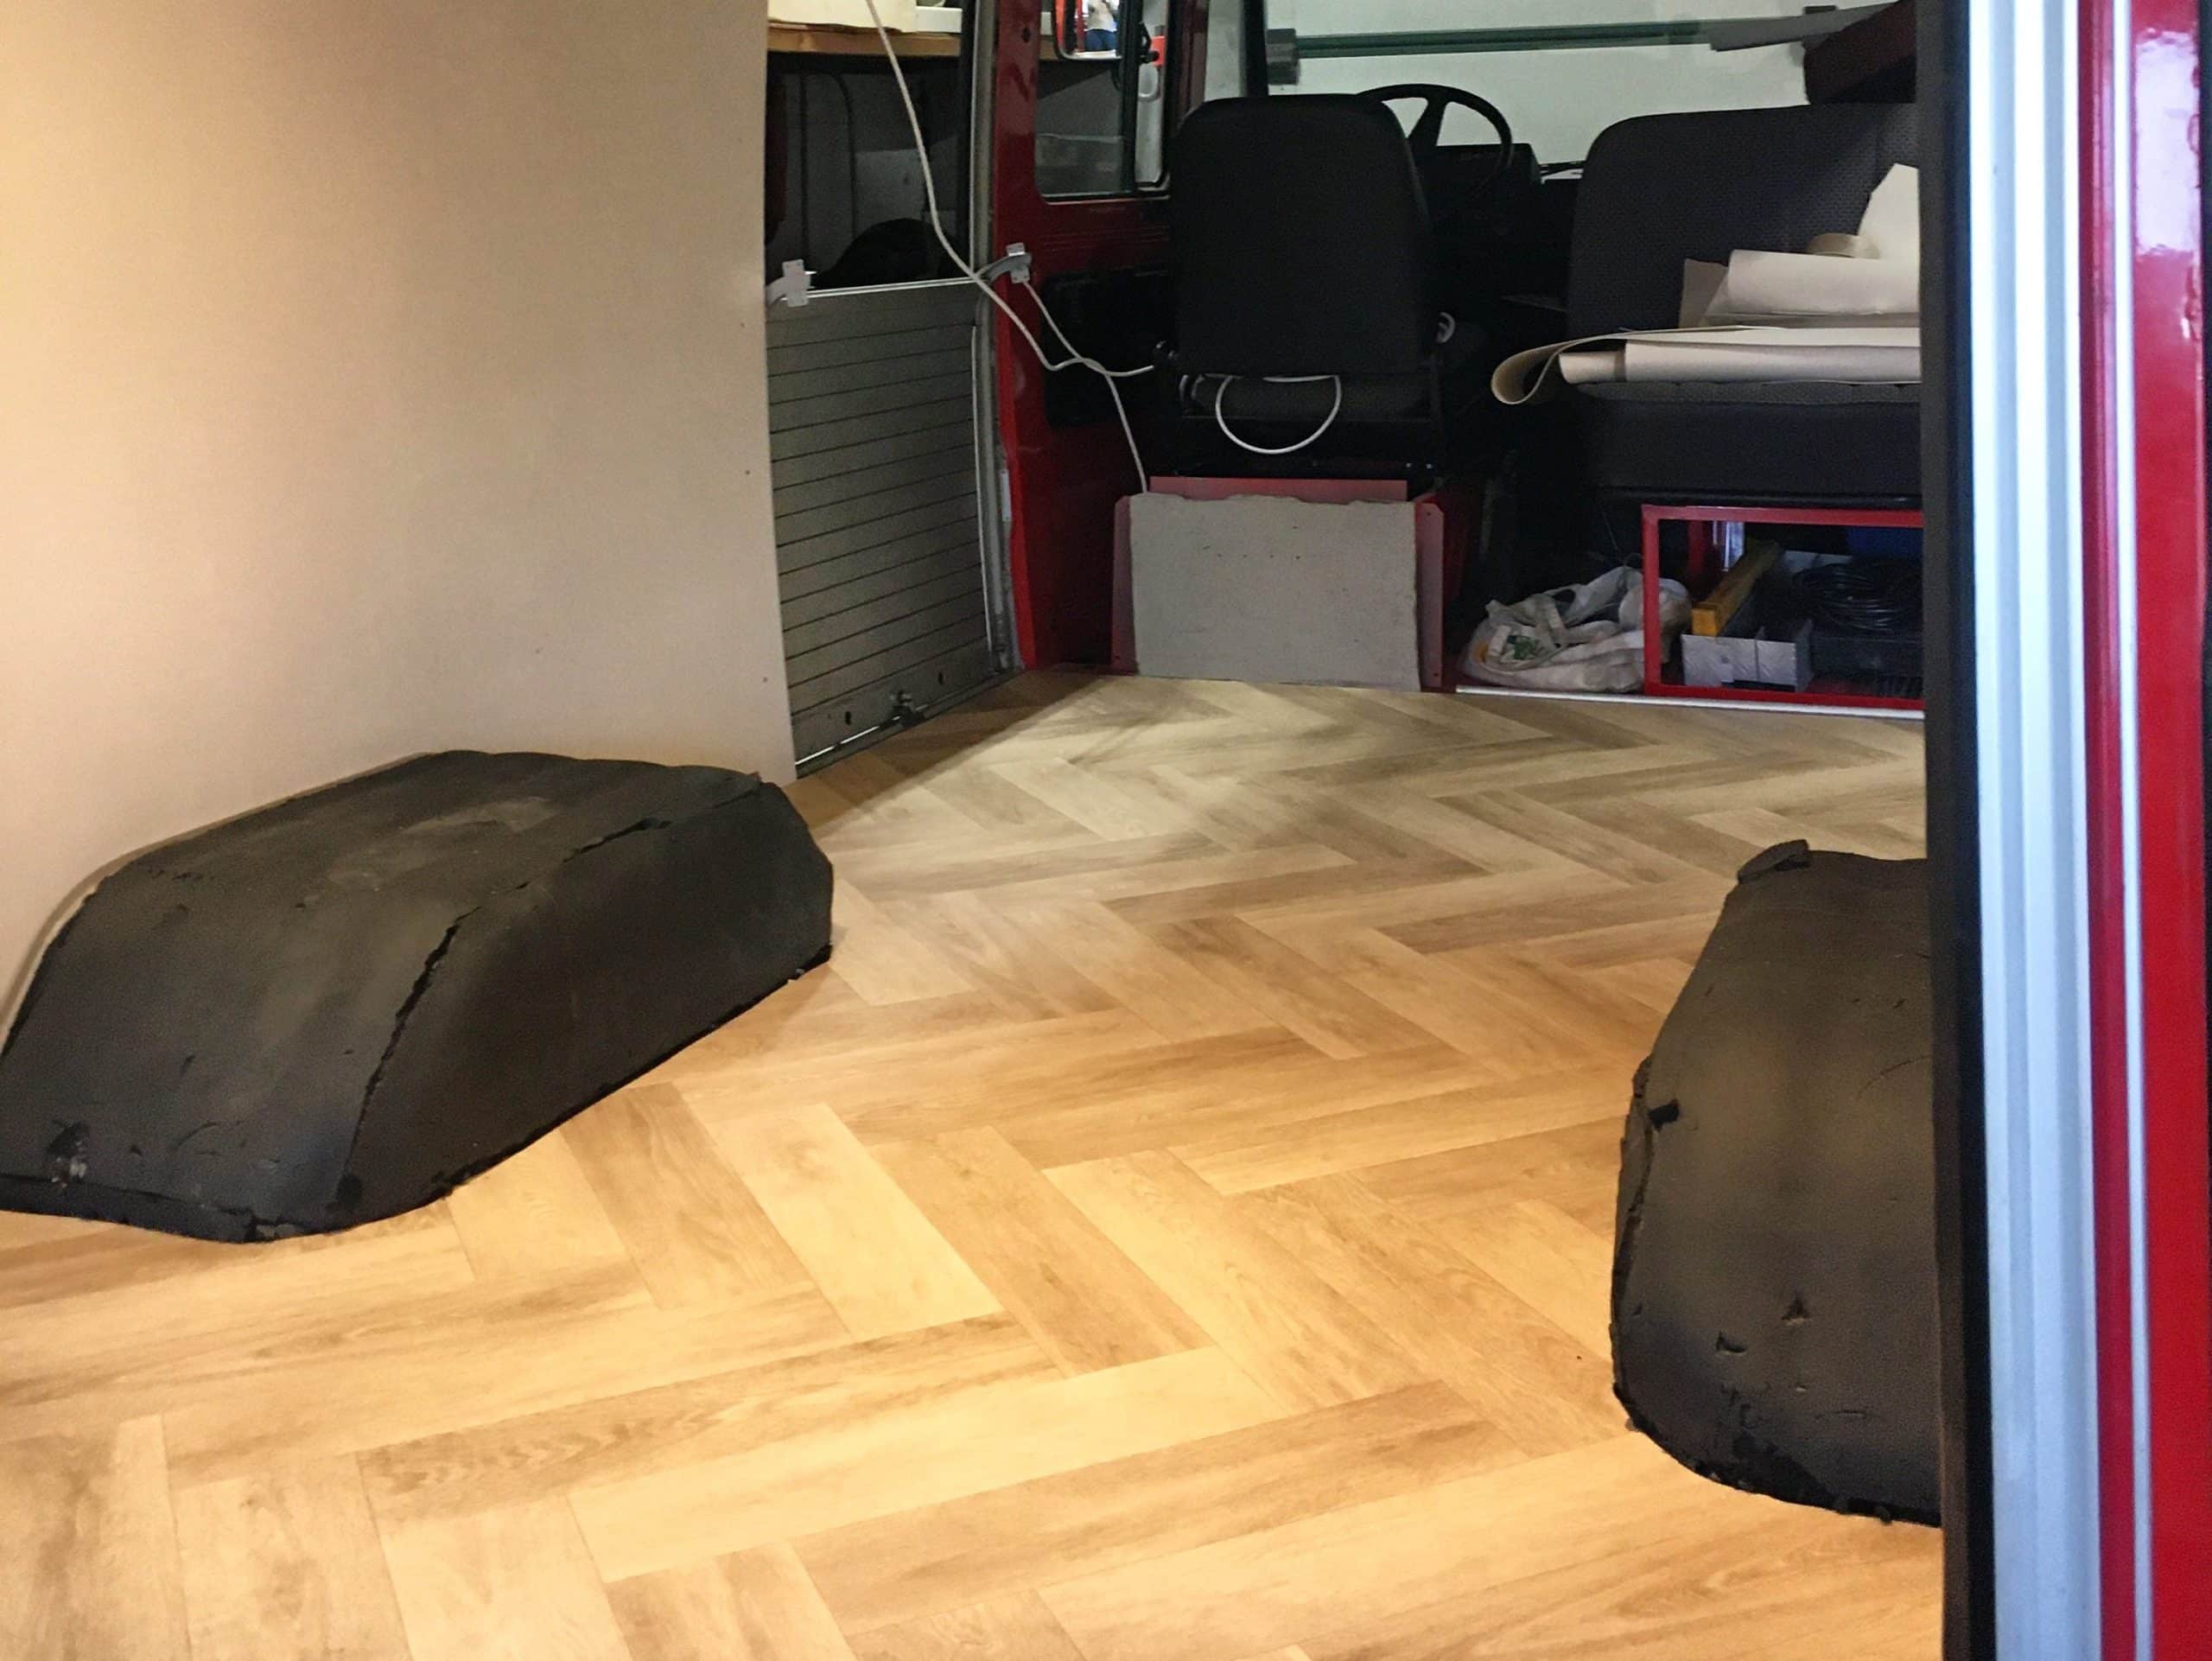
A herringbone floor!
We opted for a vinyl herringbone pattern and the laying could begin! A meticulous job, because the vinyl has to be neatly cut along the walls and wheel arches. Because it was quite a large piece of vinyl, it did not fit completely in the width of the fire truck and we had to bend it a little while cutting. After we had the right size of the sail, the gluing could begin. Caution is also advised here because if the gluing does not go well, bubbles will form in the sail and you naturally want to prevent that
Glue for the vinyl on the floor
To stick the vinyl we bought a pot of universal floor glue from the brand Perfax and spread it out with a notched trowel. This process is clearly shown in the video accompanying this article. Unfortunately we just didn't have enough glue and because the shops were closed (thanks Corona), we couldn't get a new pot as quickly as possible. Stress of course, because the floor had to be covered. Fortunately there was still a jar of Bison Waterkit. A small risk, because would this work well? But that actually made it much better! The water sealant is thinner, which means you will get bubbles in your vinyl floor much less quickly. Mind you, it stinks but after a day the smell has gone away. After a few hours of pasting, Brumm the fire truck had a nice floor richer! Together with the walls, Brumm suddenly looked so different. That already promised a lot!
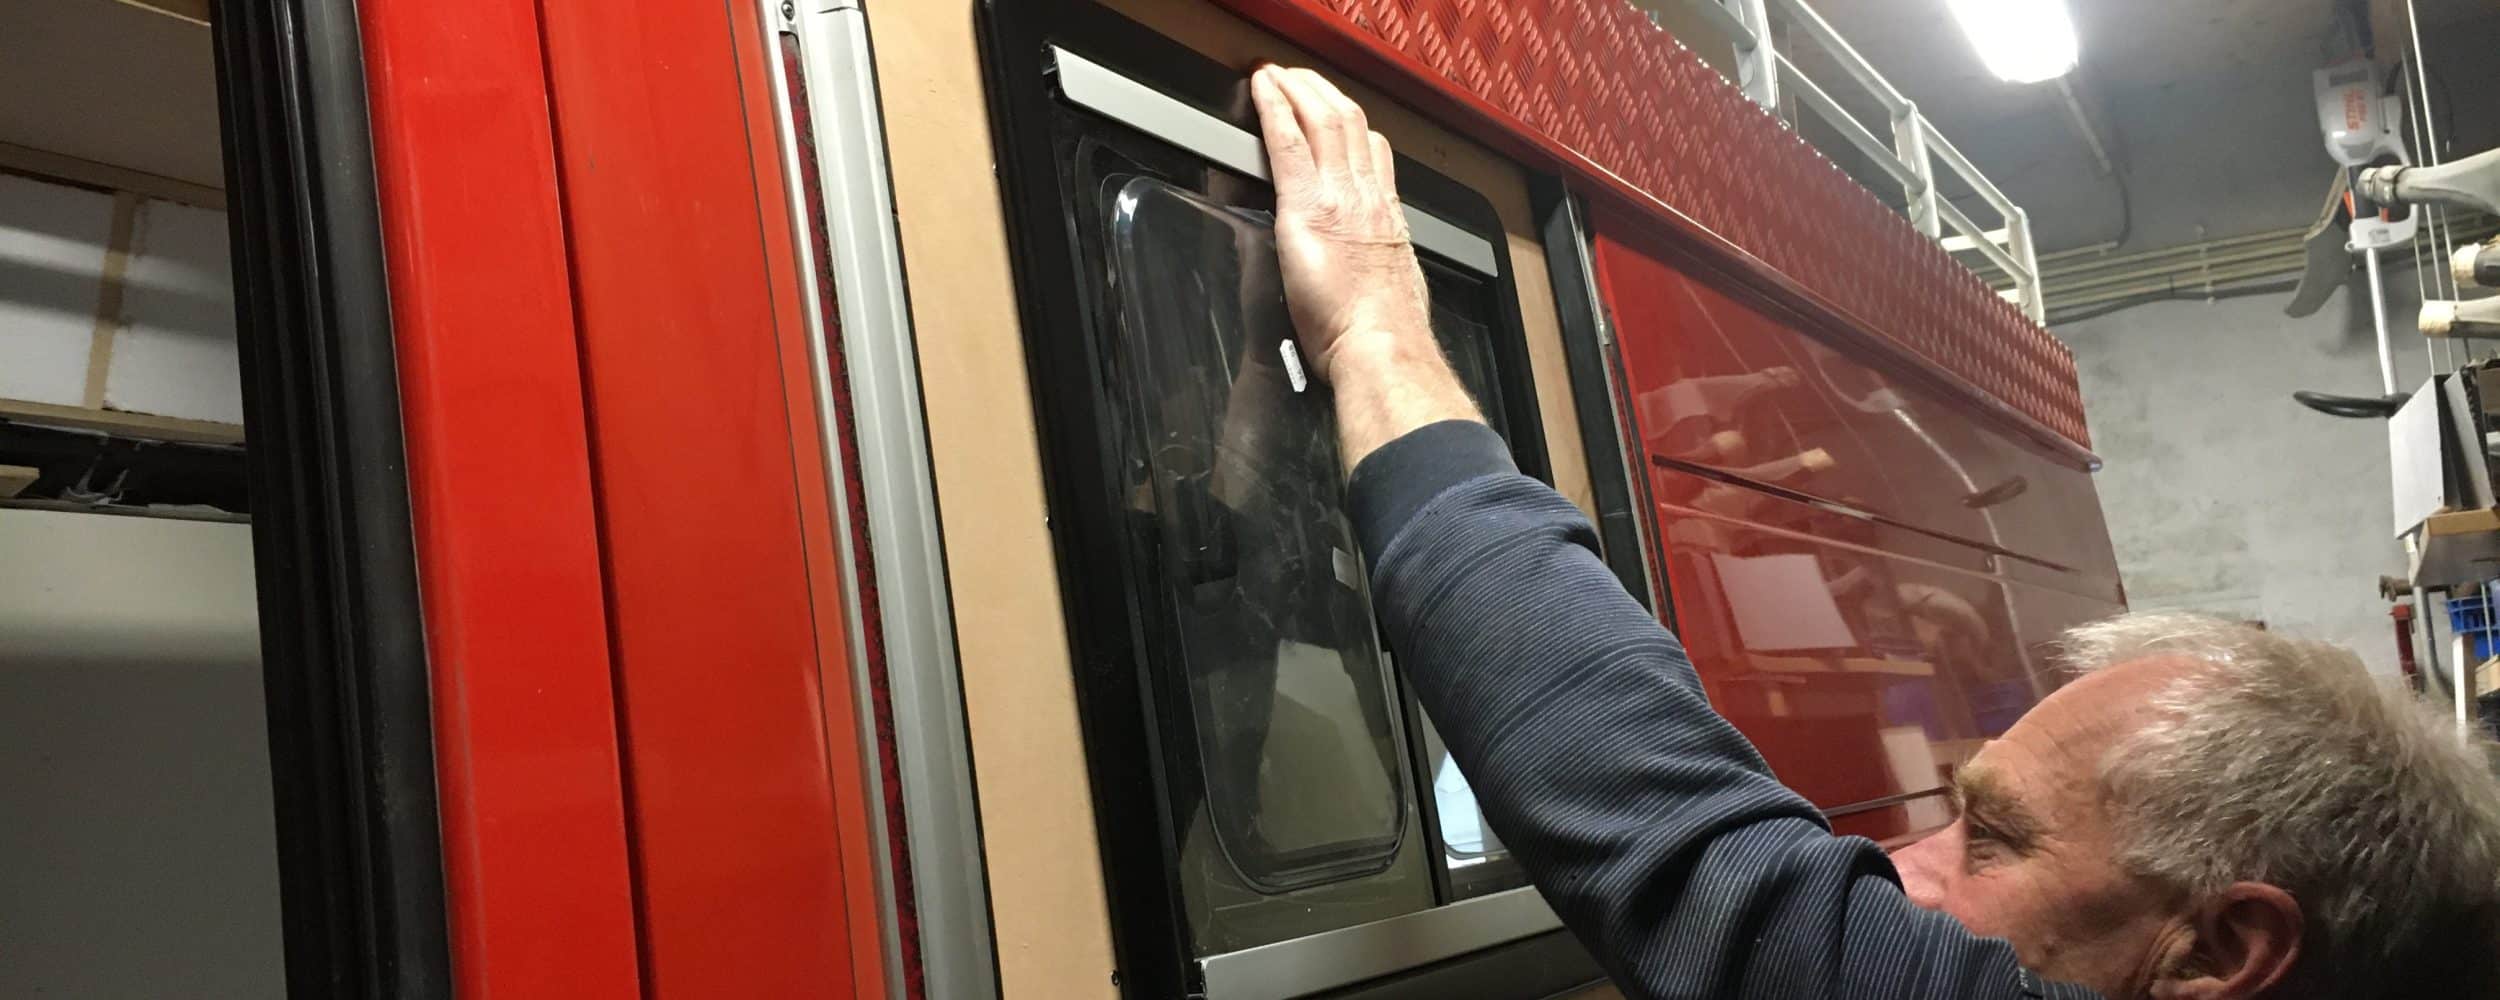
Installing windows in the fire brigade bus
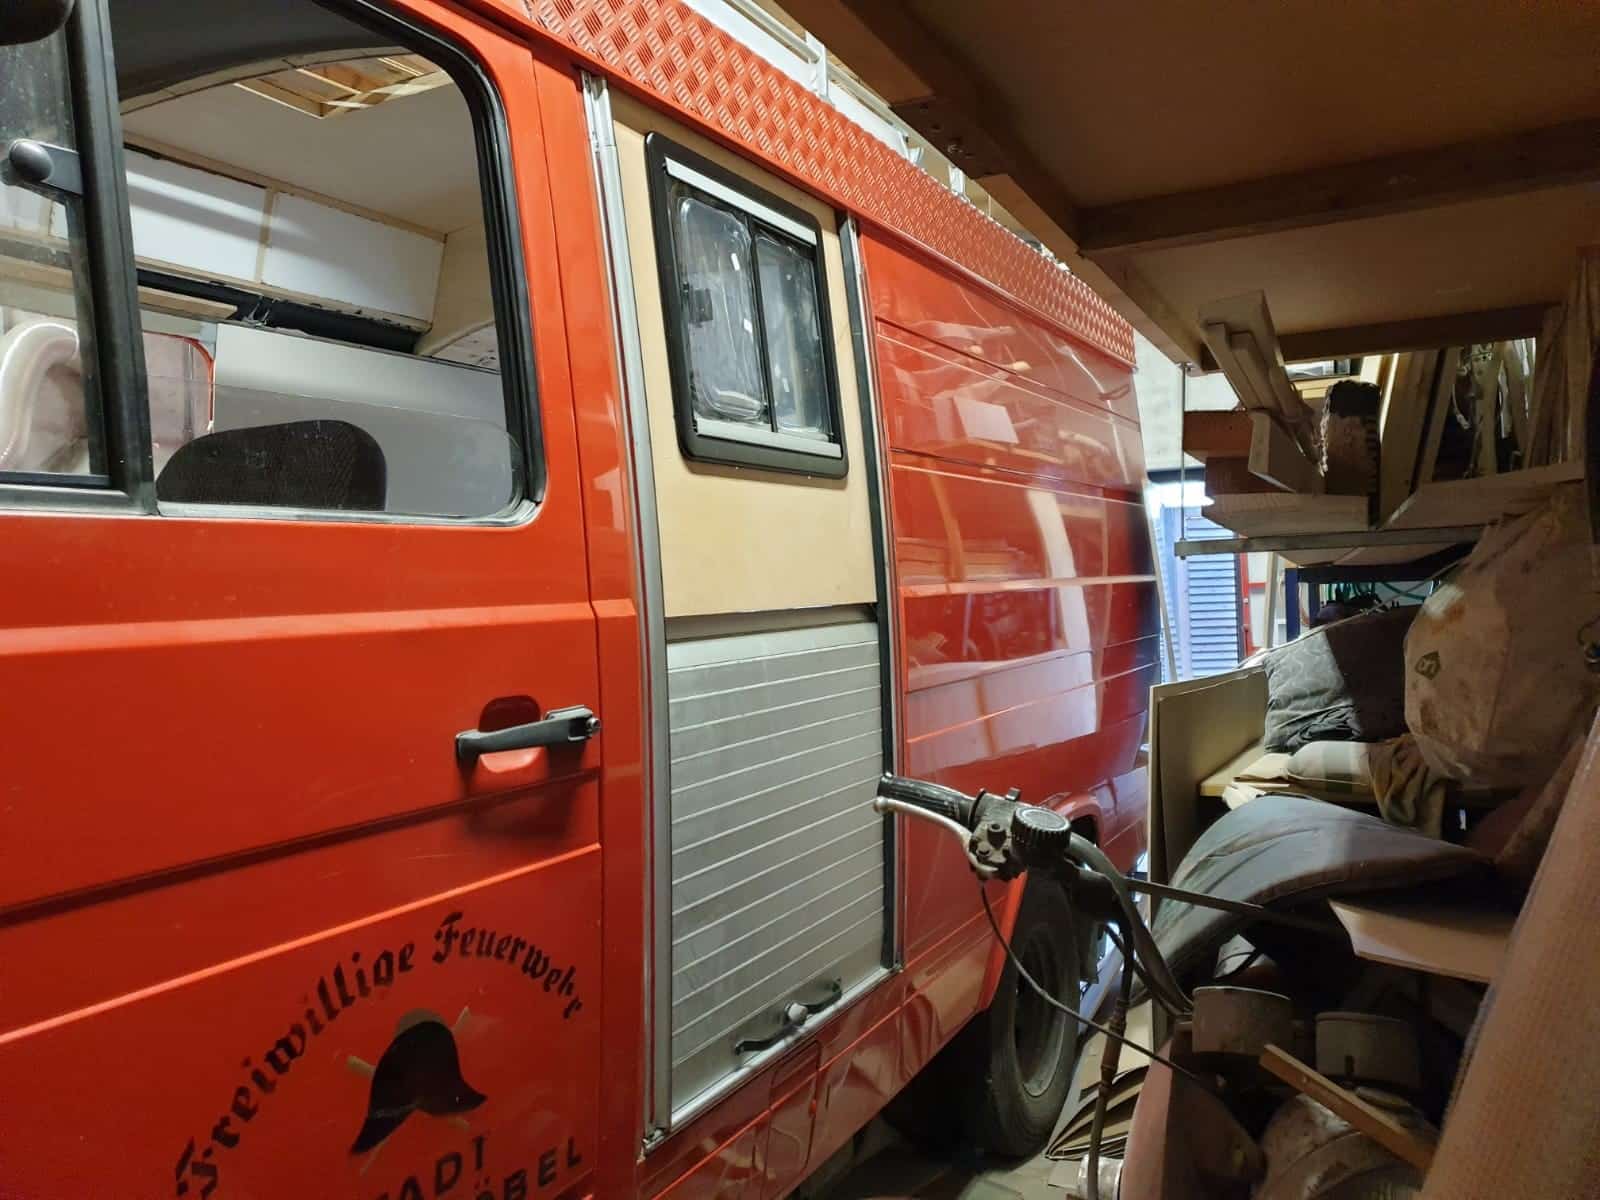
After the vinyl floor it is the turn of the windows. When we bought Brumm the fire truck, there were no windows at all (except for the windscreens, of course). Because we wanted as much daylight as possible, we decided to add 2 other windows in addition to the previously purchased skylight and to install a door with a window. For example, every wall of the fire truck gets a window. We had the ambitious plan to combine the windows with the shutters. It would be a shame to remove the shutters altogether, as they are so typical of the bus!
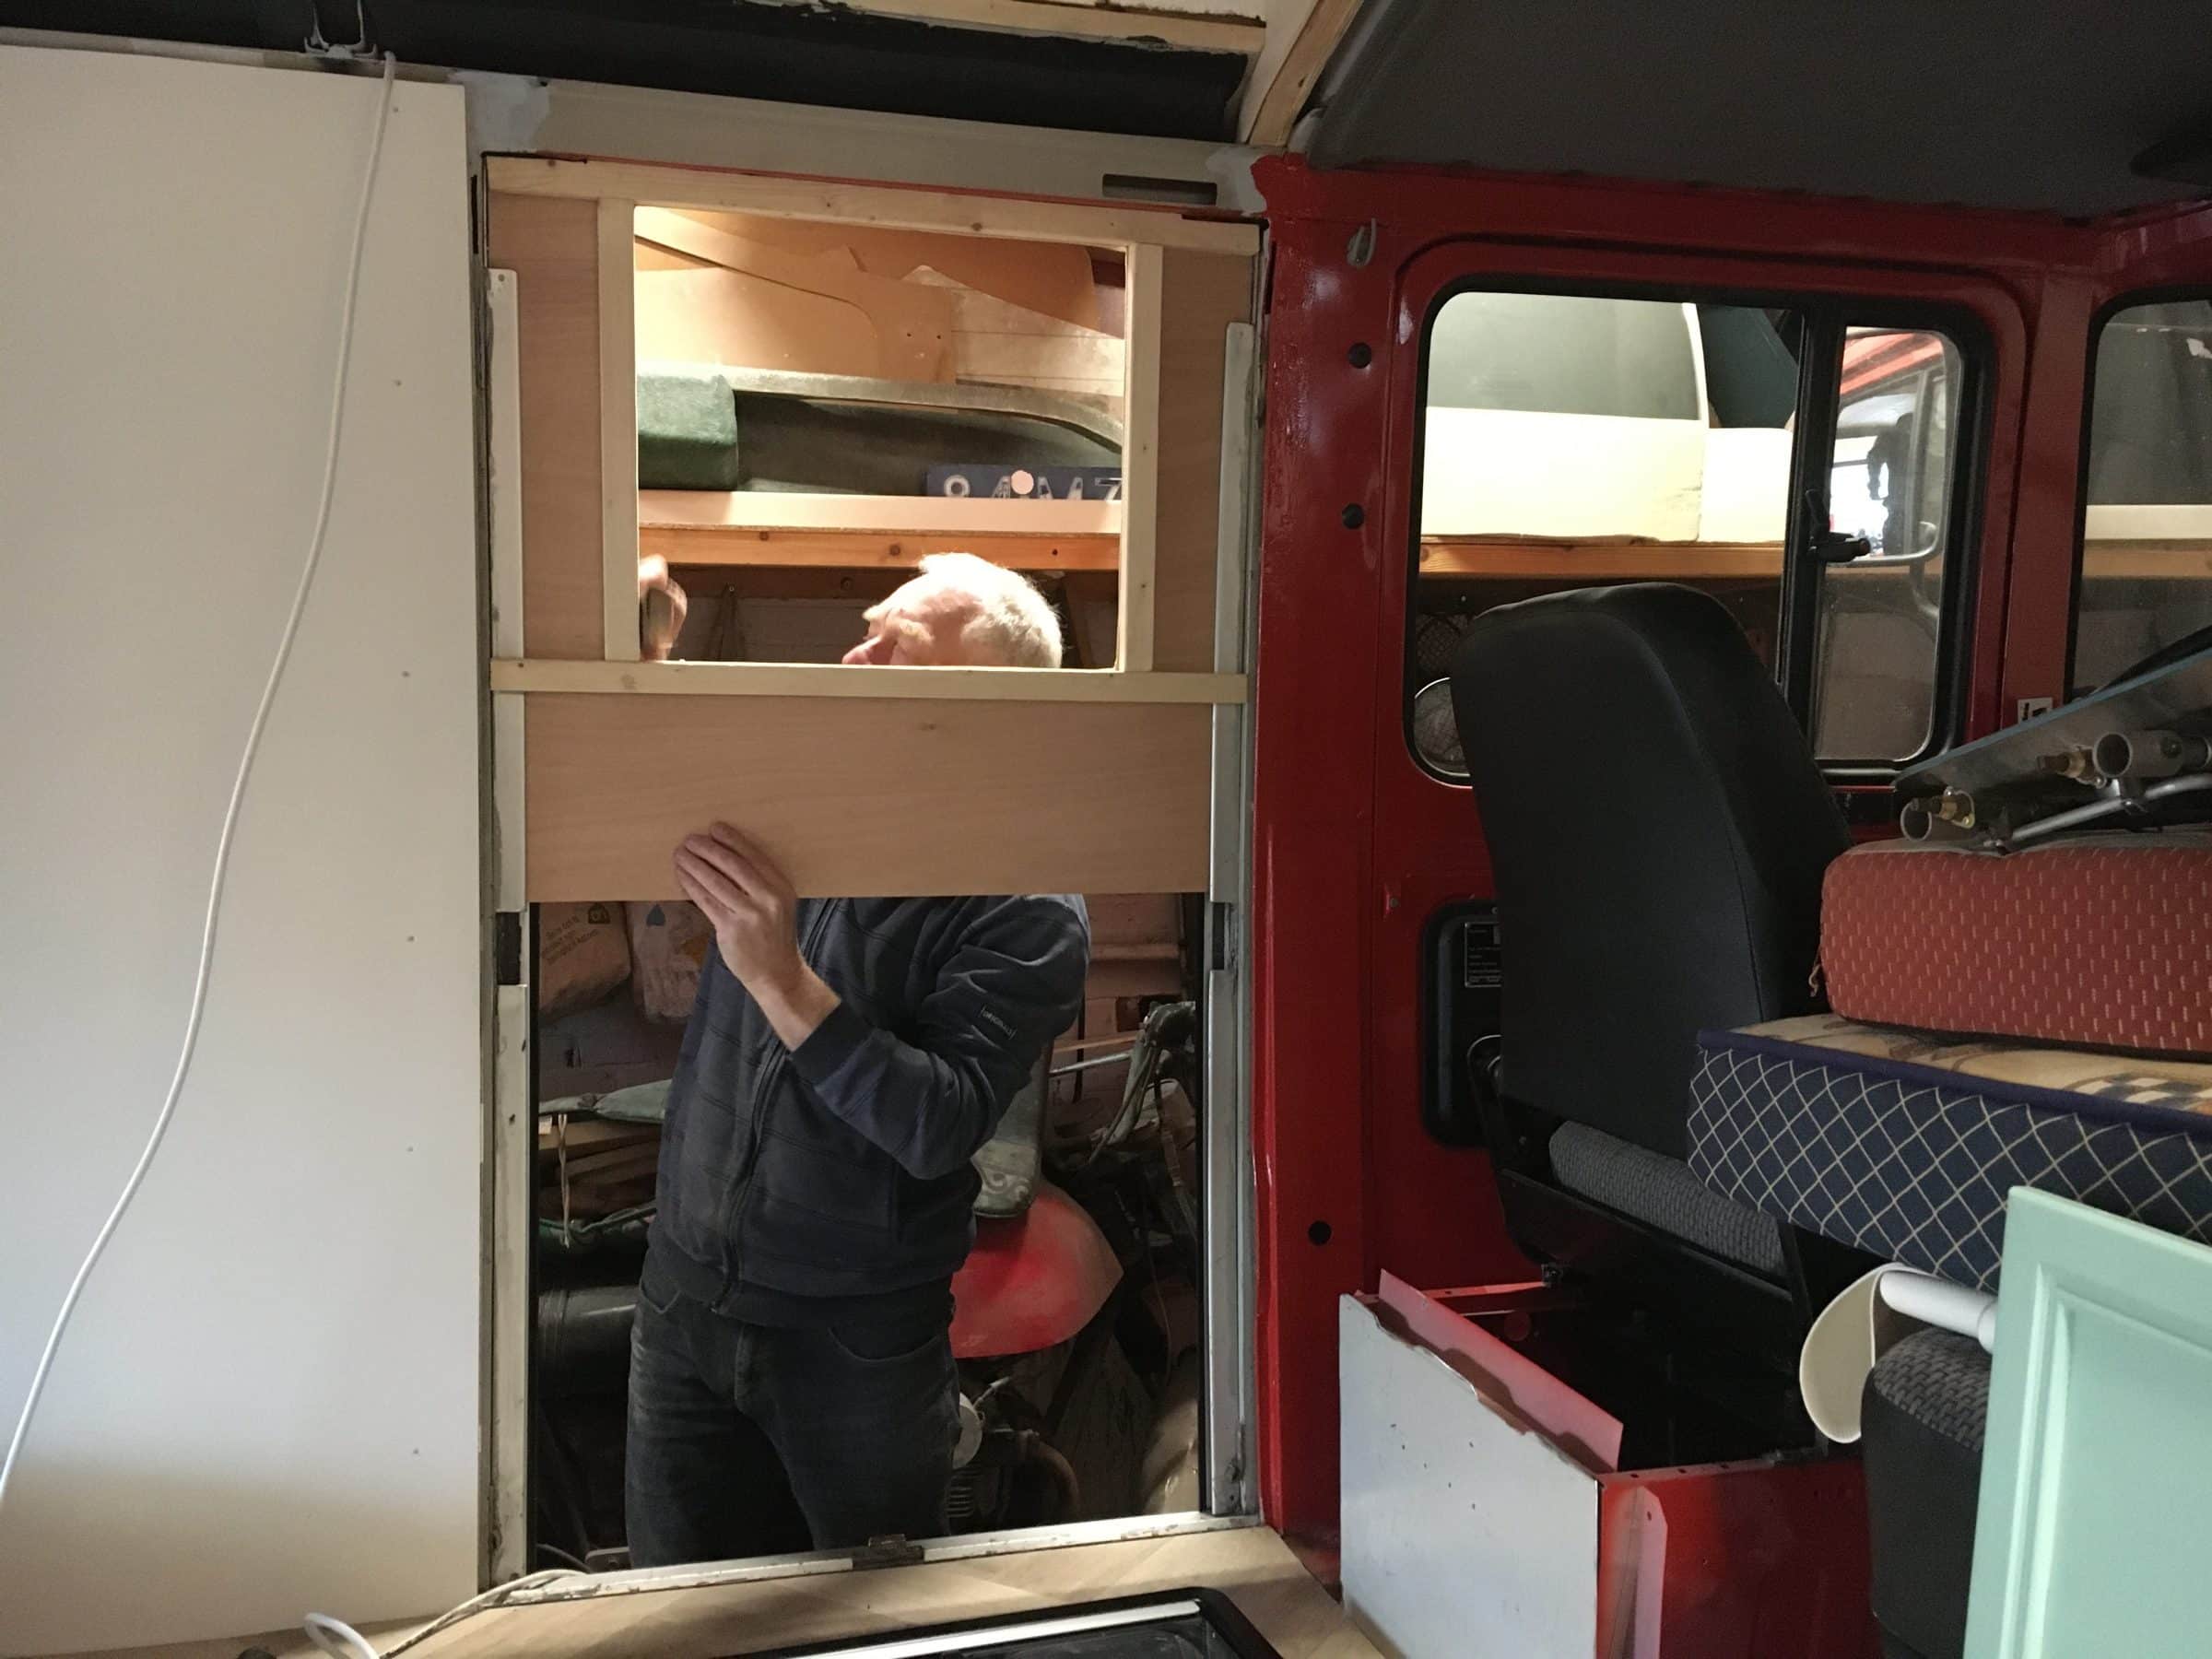
Fortunately, Denise's father had come up with the plan to halve the shutters from the bottom, make a wall above it and put the window in there. Both at the back and on one of the sides of the bus, that was the plan. Of course we already had confidence in the idea and after we had emptied our piggy bank to buy the windows (how expensive those things are!) we could get started.
From roller shutter to window
We sawed the rails of the roller shutters in half halfway and placed curved rails behind them so that the shutter rolls inwards. At the side it comes out under the kitchen worktop and at the back under the bed. We have placed a wall above the exchange hatches. We used wood for the wall and placed aluminum over it. We sprayed this aluminum silver so that the color is the same as that of the roller shutters.
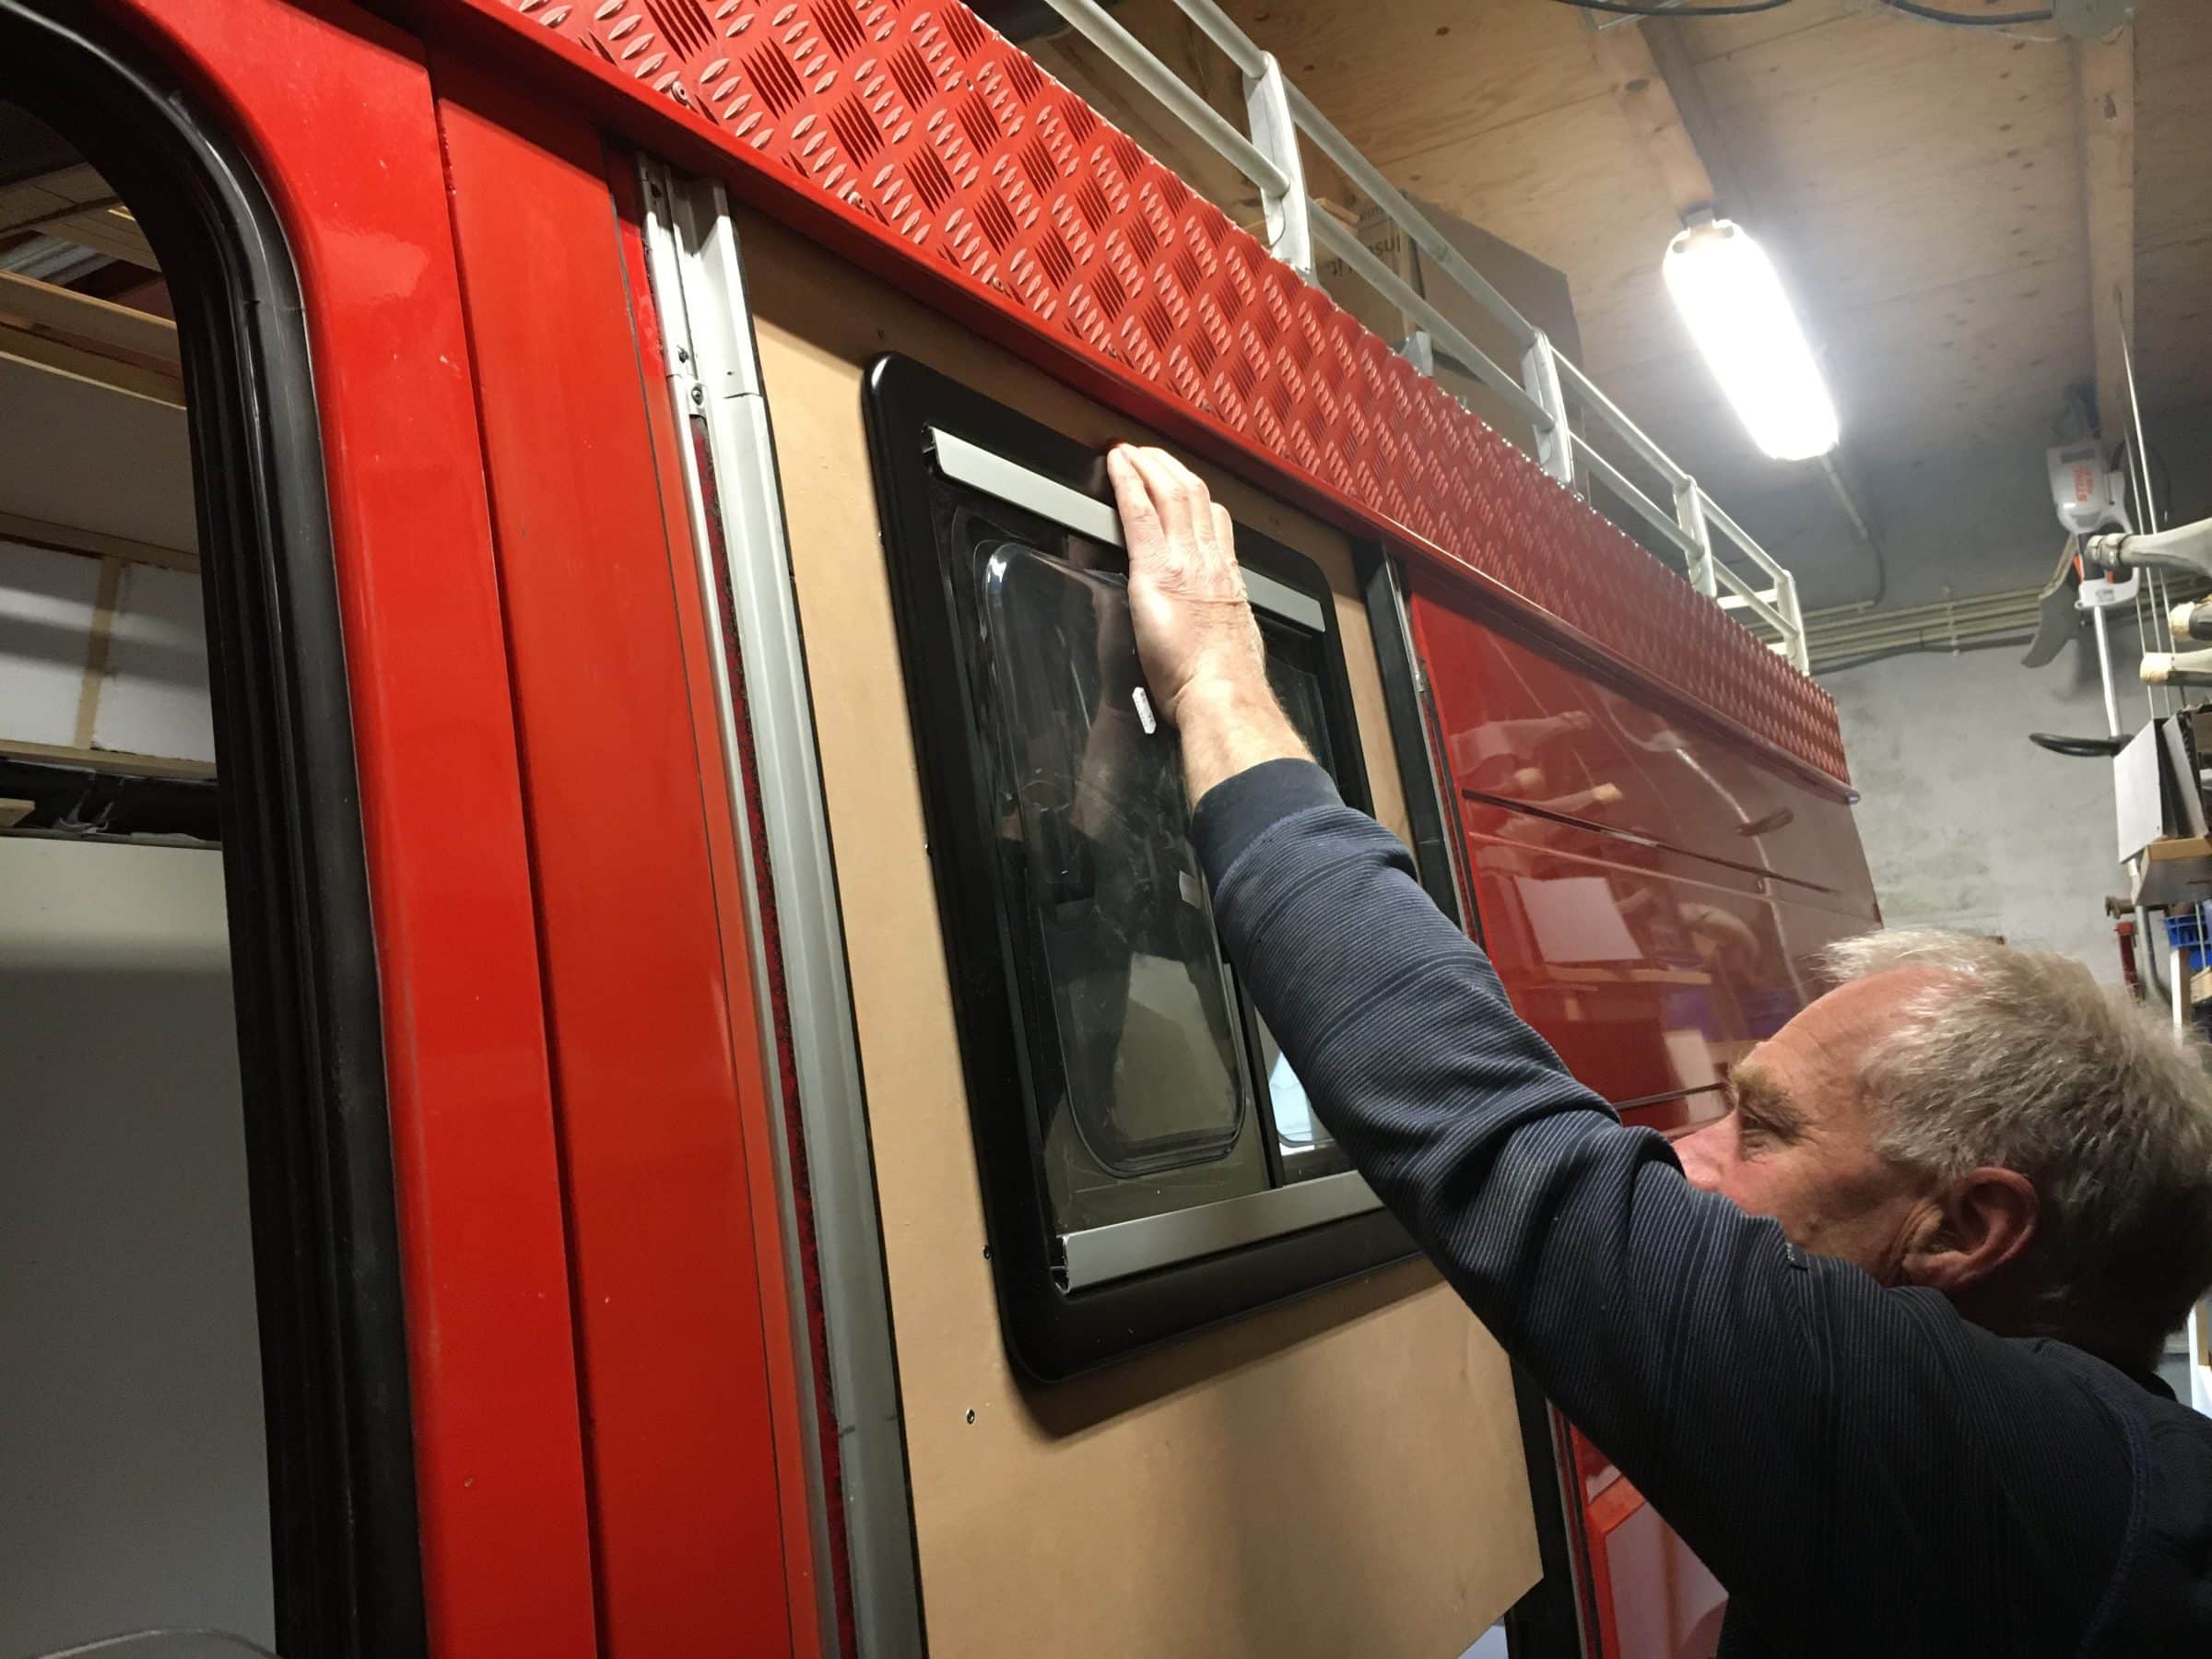
Installing the window
We also glued the aluminum to the wood with the same glue that we used to glue the roof. Then we sawed a hole the size of the window and glued insulation material around it to the inside of the bus. The wall is also well insulated. We then attached wood over it again and the window could be placed in it.
Often it all seems so simple when we write it down, but in reality this job was mega exciting and a real challenge. When it all seemed to succeed in the end, we were very happy and proud with the result. And the light in Brumm is so nice! Soon we will be able to get out of bed and look outside, because it's a nice prospect, isn't it!
We promise you won't have to wait that long for the next article and the new video is also in the works. We will guide you through the installation of the furniture.
See you soon!
Also read:
Converting a fire van into a camper (1) | The Backpack Pick
Converting a fire van into a camper (2) | Buy a suitable bus
Converting a fire van into a camper (3) | RDW design requirements and job plan
Converting a fire van into a camper (4) | A new floor
Converting a fire van into a camper (5) | Insulating the bus
Converting a fire van into a motorhome (6) | Raising the roof
Converting a fire van into a camper (7) | Installing walls, vinyl and windows
Converting a fire van into a camper (8) | Arranging and installing furniture
